Showing posts with label Cake. Show all posts

Sesame Street Cake and Cupcakes


I was recently asked to make these Sesame Street cupcakes and "smash" cake for a little boy's first birthday. I couldn't help but say yes. I had tried my hand at these before but it was some time ago (see those HERE) and I knew I wouldn't ever be making them for my own kids again. Sadly, our Sesame Street days are already over. And much too soon for my liking :(

Below are instructions and tips on how I made these. If you have any additional questions, please leave a comment below...Thanks!

The "Smash" Cake

- Bake a 2-layer cake. Use your favorite recipe. This cake was classic vanilla.
- The birthday boy's mom asked for a small cake. The smallest cake pan I had was 5" which I thought might still be bigger than she would like. So, I baked the cake in one 9" cake pan and then used a 4" ring cutter to get the two layers. I thought the cake was the perfect size.
- Dye frosting your favorite color. I used a very pale blue here so I didn't need to add a lot of food coloring.
- Frost the cake with a crumb coat first and then another layer of frosting. Smooth out the frosting. Here is a post on how I smooth out my frosting.
- To make the sign I used Wilton's fondant, dyed it green and yellow. See this post for a few more tips on how to work with fondant.
- Apply the sign to the cake and press gently to have it adhere.
- The use a tiny round tip (this was a Wilton's #3) to write the number and name on the sign.
- Finally add a decorative boarder at the base of the cake and on top to give it a finished look.

Elmo Cupcakes

- Dye the frosting red. You will need A LOT of food coloring to get a true red frosting needed for Elmo.
- Apply frosting to the cupcake using a small star shaped tip.
- Add candy eyes*.
- Add a nose. These are just orange colored peanut M&M's. Buy the big bag of M&M's b/c the single serving bags (that you find near the check out register) will only have 3-4 orange per bag.
- Add a mouth. This mouth is made from an Oreo cookie. I twisted the cookie apart, used a sharp knife to scrape off the white cream center and then cute it in half.

Cookie Monster Cupcakes
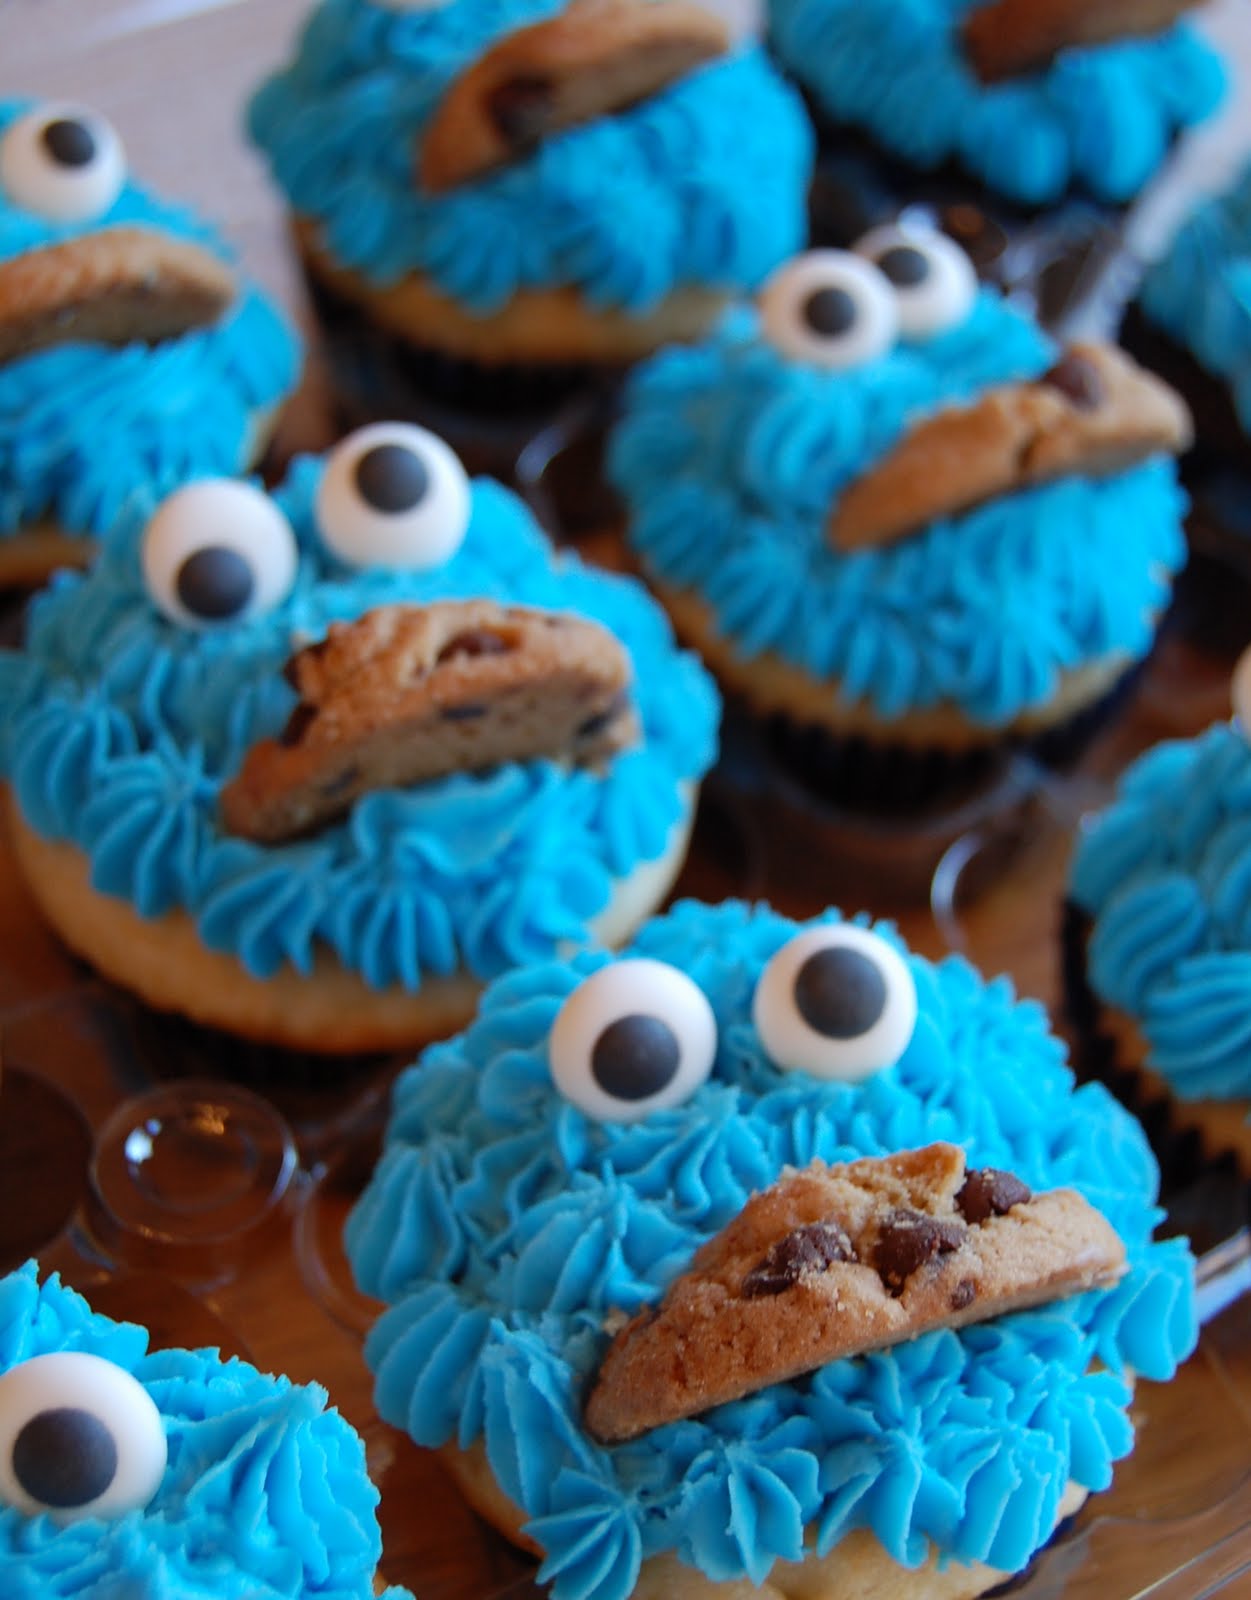
- Dye the frosting blue. You will not need a lot of food coloring to get the right shade. So start with just a little and add more as needed.
- Apply frosting to the cupcake using a small star shaped tip. I used the same tip that I used for Elmo.
- Add candy eyes*.
- Add a cookie. These cookies are the Famous Amos mini cookies (cut in half). They were the perfect size, not too big, not too little.

Oscar the Grouch Cupcakes

- Dye the frosting green. I added just a tiny bit of brown food coloring here too to give green a bit more of an olive hue.
- Apply frosting to the cupcake using a grass shaped tip.
- Add candy eyes*.
- Add a mouth. This mouth is made from an Oreo cookie also.
- Add a tongue. Just pipe a small amount of red frosting into the center of the mouth. I used leftover frosting from the Elmo cupcakes
- Add eyebrows around the top half of the eyeballs. Use brown frosting for this and a very small star shaped tip.

More Tips:
- *I cheated and bought candy eyeballs from a local cake supply store to save time. There are a few ways to make these at home but that is a post all on it's own. If anyone wants to see that, please let me know and I will post a tutorial.
- Give yourself some time to make these, at least two days. Try baking the cake and cupcakes one day. Then make the frosting and decorate the next.
- I used coordinating greaseproof liners (red, blue and green) to match the cupcakes.
- Making several different frosting colors it is helpful to use this plastic wrap technique (aka..."the frosting condom") to save pastry bags and make clean-up easier.


Here is the birthday boy enjoying his first taste of cake. How cute is he??!! Happy 1st birthday Maddox!

Swiss Meringue Buttercream


I think I have mentioned before that I don't really have a problem using a cake mix from a box. However, when it comes to frosting it has to be made from scratch. The canned stuff just tastes plain gross to me.

The basic homemade frosting typically involves powdered sugar, butter (and/or shortening), vanilla and cream (or milk). This makes a traditional American style buttercream and you can find the recipe HERE. One complaint with this recipe though is that it produces a very sugary, sweet taste....a little too sweet for some people's liking.

Swiss meringue buttercream (SMBC) on the other hand produces a very silky, buttery buttercream. It definitely has a more sophisticated taste and is just plain AMAZING!

It is a little more involved to make though but with a little know-how, it's really pretty easy and definitely worth the effort.

Ingredients:
4 egg whites
1 1/4 cups granulated sugar
pinch of salt
1 1/2 cups of butter (3 sticks)
1 tsp vanilla
food coloring (if desired)

Directions:

Step 1: Bring a pot with a bit of water up to a simmer on the stove top. In you mixer bowl add the egg whites and a pinch of salt. Start whisking the egg whites. Then add the sugar and whisk some more.
Make sure your bowl is spotless and there is no yolk in with the egg whites. Both of these things will not allow for the ehh whites to get big and frothy.


Step 2: Place the bowl over the pot of simmering water and whisk continuously for about 5 minutes, or until the temperature reaches 150-160 degrees (test with a digital thermometer) .
This is the hardest part of making the frosting b/c of the constant whisking.


Step 3: Now transfer the bowl to a stand mixer fitted with a whisk attachment. Start the mixer on medium for about 30 seconds and then bring it up to high. Whisk the meringue for 8-10 minutes. It will be ready when the sides of the bowl have cooled to room temp and the meringue is glossy.


Step 4: Make sure your butter has softened up. Then slice it to 1 inch chunks. With the mixer on medium speed, add the butter chunks one at a time. Make sure each chunk gets almost completely incorporated before each addition.


Step 5: Add your flavoring extract and coloring. Bring the mixer on to high until fully incorporated.


Step 6: You may notice that your buttercream has gotten a little soupy or curdled looking at this point....DON"T PANIC!! Just stick it in the fridge for about 5 minutes and the whisk on high for a few minutes until it comes together again.

That's it...you just made a beautiful and creamy buttercream. Enjoy!!


The video below by Dyann Bakes is really great tutorial. You will notice some small differences in the way she makes her SMBC and the directions the I wrote above. However, the basic steps are the same and I found this video very helpful when I was first learning to make this type of buttercream, so I hope you do too.


Source: SMBC adapted from Martha Stewart, video courtesy of Dyann Bakes

Easter (Bunny) Cake


Just wanted to share with you all a sweet, kid-friendly Easter cake I made recently.


This was a lemon cake with lemon buttercream and fondant bunny on top. The bottom border was covered in buttercream grass and simple, colorful jelly beans!


Although I am not artistically gifted, fondant is very forgiving and I think this little guy came out pretty cute.


Happy Easter

Princess Castle Cake


I decorated this princess castle cake for my neighbor (and great friend) daughter's "princess and knights" themed 5th birthday party.

The inspiration for the cake came from the brilliant Glory Albin from Glorious Treats. The birthday girl's only request was that the cake be her favorite color, light blue.


While I did the decorating, my friend Polly (who is also my baking partner for Sugar Lane Sweets) baked the cakes. Both the 6 inch round and the 10 inch square cakes were lemon.


The birthday girl and guests loved it. But I'm not going to lie, this was a bit of a challenging project for me. I was getting a little frustrated during some of the decorating and rushed through a bit of it. There were a few of sloppy mistakes but I think all together it came out nice.


The birthday girl (in blue dress and crown) and her princess friends.


My daughter didn't want to dress up as a princess or wear a crown but she still had lots of fun at the party.

My Little Pony Cake (s)


My daughter celebrated her birthday with friends at our local My Gym (which we LOVE, LOVE!). This was actually a joint party for her and one of her best friends. The girls are in the same preschool class, her mom and I are good friends and their actual birthdays are only a day apart. So, doing a joint party worked out perfectly!

We decided to make a My Little Pony cake for the girls because they play with the ponies at school all the time. I was inspired to make two cakes joined together by a rainbow from this picture on Flickr.


Most of the cake was pretty simple to make but the rainbow gave me some trouble. The final rainbow I used was version #4!


The birthday girls sharing a giggle :)


And blowing out their candles.


The inside of this basic vanilla cake was a chocolate mousse filling. Next time I will definitely add some more because it was yummy!!


To see more pictures of this cake and the party, check out my Facebook page....the link is on the right-hand side bar.

Strawberry Shortcake Cake


My daughter really wanted a Strawberry Shortcake cake for her birthday and this is the cake I created. We had this cake at home the night of her actually birthday.

I found the Strawberry Shortcake figures on clearance at my local grocery store a few months ago and knew these would be perfect!


She loved it just like she loved last year's cake. You can check that one out HERE. She still talks about that Belle cake today!

A close up of Orange Blossom. Yes, Strawberry and her friends have gotten a bit of a makeover since we were kids...they're quite sassy looking these days, huh?


It's a little hard to tell the scale of this cake from the pictures but it was actually pretty small. Since it was only going to be a few of us eating it I used the smallest cake pans I had, a 4 inch and a 6 inch. I learned that frosting such small cakes is much harder than frosting a big cake.


After cake, she got to open her gifts. My dad got her this "big girl" bike...she was so excited!

Birthday Mini Cupakes


This week's posts are going to be all about my daughter's birthday treats. Thats right, she gets multiple cupcakes/cakes (as does her brother) for her birthday. We always end up celebrating the kid's birthdays 3 times. Once at school, then at home for a family party on their actual birthday and finally with a big party on the weekend with their friends. It's a lot but both kids truly love it and for me it's worth the trouble.


So, here are the mini cupcakes with number "3" fondant toppers I made for my her preschool class. The teachers at her school do not like parents to bring in treats with a lot of frosting (especially colored frosting) because the kids usually make a huge mess with these. And I agree. Plus, they don't really need to be eating that much sugar at 10 AM. These minis were a great way to celebrate without going overboard.


Yum! Here she is enjoying her treat with her good friends.


I can't believe she is three...it seems like this was only the other day-sigh...

Funfetti Cake and Cupcakes


I know it's been a while since my last post but unfortunately we all got hit with a nasty cold bug here. I am so happy we are all healthy again!

This is of course a birthday cake. I made it for my son's birthday party ( which we held it at a local inflatables play place). I used a box funfetti cake and just added in an extra 1/4 cup of sprinkles for more color.


A homemade, bakery-style buttercream and fondant Lego pieces went on top. The kids didn't realize these weren't real and I had to tell them that, Yes...they could it them!


I also made a small 6-inch cake out of the same batter.


I had a originally planned a completely different cake, but after the week I had this was about all I could muster. And you know what...it was just fine :)

Candy Birthday Cake


Six years ago, I welcomed the sweetest little boy into this world and today we celebrated his 6th birthday (holy cow that went fast!!).

I made my son this fun "candy" cake because he loves....CANDY! I mean really, really loves all types of candy. In fact, the two Christmas's before last he asked Santa to bring him a lollipop and a candy cane....no toys, just candy!! Now, any time he loses a tooth and the tooth fairy leaves him a dollar or two, guess what he always wants to buy...yep, candy :)


The cake itself was funfetti which worked perfectly with the colorful assortment of candies on the outside. The frosting...my favorite Swiss meringue buttercream.


Then.

and Now :)

I surprised him with this cake and he loved it!


HAPPY BIRTHDAY SWEETHEART! I LOVE YOU!!